|
The Left Side Panel
 
Click to Enlarge
After finishing the work on the right side and the front, now it was time to look at the left sit of the case.
As the computer should be fully functional, this side should be abled to be opened and closed for maintenance just like any other PC. Therefore I had to mount all mothe boards on the panel itself, and take care that the original mounting studs are used.
As you can see on the pics, the panel itself is not visable at all.
The Power Supply

Click to Enlarge
The (standard) 350 Watts power supply unit has a temperature controlled fan, which increases the rotation speed of it’s fan when the temperature rises. This PSU has on the bottom side, right above the processor, some cuttings for taking in fresh air for cooling. The ideal placement of these cuttings would have the warmed-up air from the processor heatsink to be extracted immediately from the case.
As for the finishing touch, I’ve removed the original fan of the PSU and replaced it with a Crystal Clear Case Fan with four Red LEDs in the side, and two pulsating Blue LEDs in the middle.
The VFD Display

Click to Enlarge
Through a buy-it-together action on a forum in the Netherlands, I had bought a 2 x 20 VFD display, which I had never used because it was a bit too wide to mount in a front bay.
I used this VFD display to give the case a bit more of a ‘bizarre’ look, and I placed it prominently on the front of the case. With some 2-component glue, I glued 4 studs on to the front, on which I mounted the VFD with 4 M3 screws.
Behind this display I mounted a row of high density red LEDs, which were kindly donated by a car’s 3rd break-light.
As sort of an ‘extra’ I placed a skull on top of the VFD display, in which I’ve placed a Ultra-violet coloured LED and 2 yellow LEDs behind it’s eyes, which are blinking.
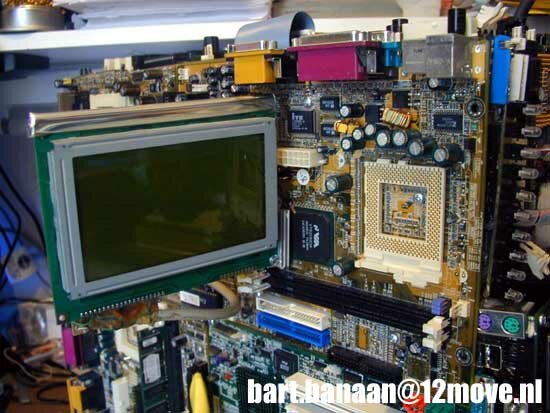
The Graphic LCD display
  
Click to Enlarge
Because I like Graphic LCD displays very much, and because I have some displays lying around, I wanted to mount one on this case also.
I had this DataVision 240x128 pixel display, which is quite easy to connect to a LPT port. It only needs an additional 5 Volts for the backlight, which is connected to a molex of the power supply.
 
Click to Enlarge
Now I only had to think of a place for the display... on the top of the computer was no option, since it stands on top of my desk, and I would not have any view of it. Therefore, It had to be mounted on the left hand side.
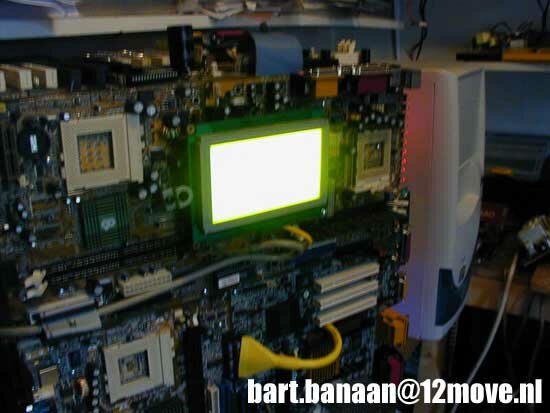
The Retraction System for the LCD Display

Click to Enlarge
I had to think of a way to place the LCD firmly on to the case, but also have a good view of it. Therefore I had to make it retractable.
At the previously mentioned computer fair, I had bought a small heat-pipe cooling unit from a laptop computer. This cooling unit was exactly what I needed for my retraction-system.

Click to Enlarge
The LCD display is now firmly mounted, and it can be extended in any angle. For the graphical output, I used a great program called PowerLCD. You can find information about the PowerLCD on .
Previous Page - Introduction
Next Page - Final Steps
|
 The MoBorg: What do you get when you mix a PC with Star Trek's scariest villain? Read on and find out the thought process, and a how-to in making your own Mobo Rig, aka the MoBorg.