The Extreme Computer Mod: This article features the step by step creation of an extreme computer mod, aka ECM, utilizing a MA-Audio HK 4000D series digital 4000 watt AMP. You have to see it to believe it. The Extreme Computer Mod: This article features the step by step creation of an extreme computer mod, aka ECM, utilizing a MA-Audio HK 4000D series digital 4000 watt AMP. You have to see it to believe it.
|
| Date: |
April 9, 2003 |
| Mod Site: |
|
| Written By: |
|
|
The Top Panel
Now comes the wiring of the mobo to the shell. This involved the LCD panel, and power and reset switches, the power and HDD LED's and the intake fans. The shell came with two cool indigo LED's. I couldn't resist to use them. I went to the local Radio Shack for the switches and had some spare wires and connectors. Extra audio connectors work great. I mounted the switches and fans onto the grid portion of the top.

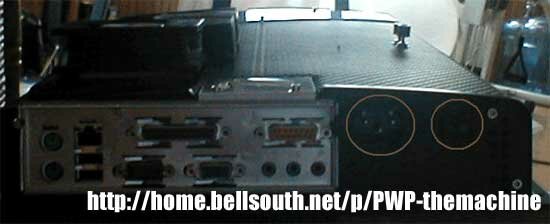
The Back Panel
Next, I modified the back panel. I cut out a rectangle for the Mobo hook-ups. Then made two small squares for the AC connector and on/off switch. The finished back panel...

The Front Panel
It is time to move to the front of the shell. I cut a rectangle out for the DVD player. The finished front panel...

The End
Now, mounting the 3 - 92mm and 80mm intake fans. What's left? The dress up parts. I used automotive wire looms to keep the wires together and to hide my not so perfect cuts. Now, to assemble the shell. The last mod was to trim the top part of the shell due to the size of the CPU's heat sink. And...the finished product. Don't forget to check out the and check out the rest of , as it has a lot more info on this project!
If you have any comments, be sure to hit us up in our forums.
HOME
|