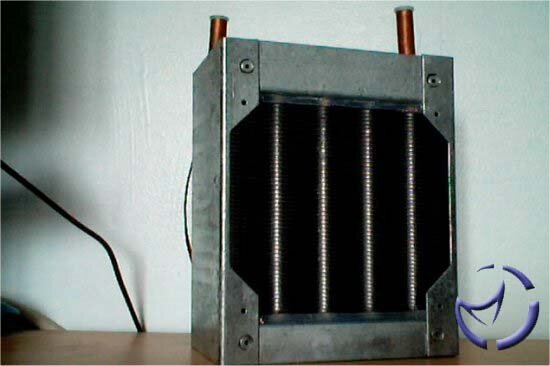
The Radiator
Originally the W&CC Radiator I had for review was a lightweight black 120mm radiator constructed from aluminium. This is one of the parts that have been updated and as you can see it is a good deal larger now. The full specs for the new radiators are:
3/8 OD internally grooved tubing. (This improves surface contact and agitation within the coil)
3 rows of tubes /5 tubes per row.
Aluminium fining /louvered and with splits set at 10FPI. (These slits increase the turbulence of the air as it flows across the fins and gives rise to greater heat transfer rates.)
Single circuit coil.
Available, bare or plastic coated in various colours.
The 2 Radiators that I have received (1 aluminium, 1 copper) both arrived with the plain galvanised steel surround so don't expect to see anything pretty! However it will allow you to paint them as you see fit. The new design also increases the amount of internal tubing to the coil; 13 u-bends (3 rows, 5 tubes per row total coil) and all of the tubing is internally grooved. The coil for both the copper finned and the aluminium finned radiators are made from copper, and everything in the kit is anodized to make it inert (so no battery effect here).
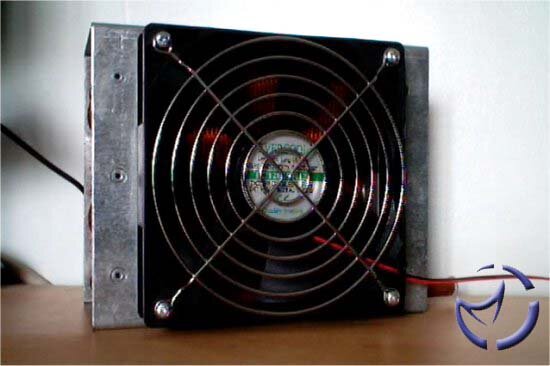
The included fan has been changed from the rather noisy YS-Tech fan (although this is still available) to an Evercool 76CFM fan which puts out a much quieter 30dB's at full speed. The fan is quite happy to run at anything between 4v and 12v so those of you with a rheobus will be able to easily control the speeds here. The fan simply screws down and a finger guard is included.
The Radiator features a plenum style fitting for the fan, so that their is no air escaping through the radiator except via the fan. The fan connects up via a standard 4 pin Molex connector and does include a pass-thru if you need it. One thing missing from the new design is the push fittings that were used thru-out the old design which is a shame. It wasn't a problem as everything connects up easily enough but the push fittings just made everything so much easier with no need to fight to put the tubing over the pipe-work. Not using push fittings but maintaining 10mm OD tubing does offer the advantage in that it will increase the amount of systems the radiators are compatible with.
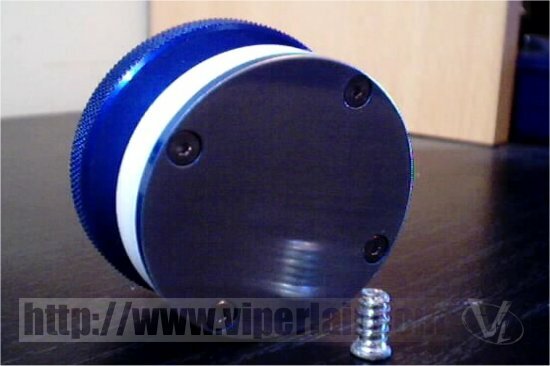
The Reservoir

Not much has changed from the old style reservoir although the new additions are welcome. The top and bottom of the reservoir are made of solid anodized blue aluminium with the exterior made from acrylic in a cylindrical shape. On top of the reservoir we find the inlets and outlets of the system.
The first outlet is a grommet for the power lead, second is the filler hole (supplied with cap to help prevent evaporation), and of course the other two are the inlet and outlet pipes for the water itself. The inlet pipe descends down into the reservoir from the push fit connector, and exits just next to the pump. The pumps outlet extends up into the corresponding push fit connector in the lid and is joined by a flexible tube (to help prevent noise and damage from any vibration).
The new reservoir is also fitted with a bolt mounting kit to allow you to mount the reservoir either horizontally or vertically as you see fit. The included MaxiJet 1200 pump hangs submerged in the reservoir and sports a ceramic shaft to minimise the heat transferred back into the water. With a maximum pumping height of 69” and 1110 Litres (295 US gallons) an hour moved around, you could easily place the reservoir on the floor and pump the water up to your case on a desk. The pump uses a standard UK 3 prong plug and with no ON/OFF switch simply starts up when plugged in.
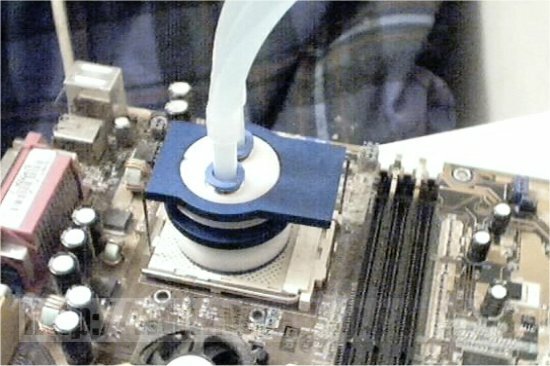
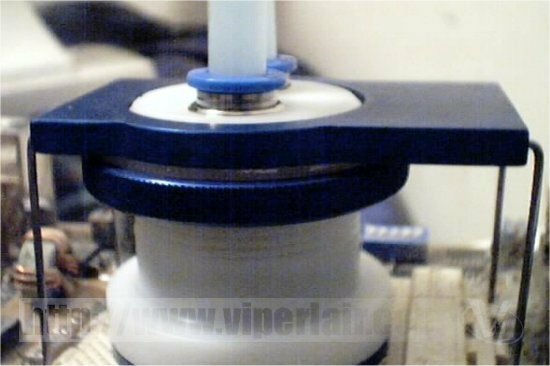
The CPU Cooler
This is something that the guys at Wet and Chilly Chips are very proud of and something that they have put a lot of thought into. Ripped from there website, they explain it best.

The flow of coolant when entering our heatsink base is split into six separate channels and two separate directions. This has the effect of increasing the surface area & contact time within the unit but still maintaining a high total flow rate.
As you can see the base used here is aluminium, and whilst there is a copper based core available upon request, the W&CC guys reckon the aluminium base is more than enough. The cooler features matching push fit connectors as found on the reservoir which coupled with the clipping mechanism makes installation a breeze.
The clipping mechanism for the AMD clamp simply fits over the 3 lugs on each side of the zif socket. Made from one solid peice of aluminium this new design AMD clamp is more reassuring during installation when compared to the old version, in that the old version had the possibility of the wires bending; not so with this one peice design.
The universal clamp for both Intel and AMD systems attaches with bolts to the mounting holes found on your motherboard in a manner similar to the Swiftech and Alpha HSF's. After this point installation becomes identical for the Universal clamp and the AMD only clamp. Both of the new clamps have a nice neutral polished colouring that will go with anything you may have in your system which is again an advantage over the old designs blue appearence.
I've taken a few pictures using the old style AMD clamp, but this will be enough to show you the simple fitting methodology. Around the cooler itself is a screw and washer assembly. To apply pressure to the CPU die you simply wind the screw up to the clamp (and therefore force the cooler down) until it's tight. That's it. This method has the advantage of producing only downwards pressure on the CPU but also the disadvantage that there is no indication to how much pressure should be applied.
I personally found winding it till it was an effort to tighten it anymore to be enough, there's no need to keep winding it up although it is possible. The clamp has a simple protrusion that inserts into the coolers casing, to ensure that whilst you're tightening up the screw for the clip, you don't start going around in circles with the cooler.
A very simple fitting method that also looks good, thanks to the shiny polished aluminium clamps and cooler design.
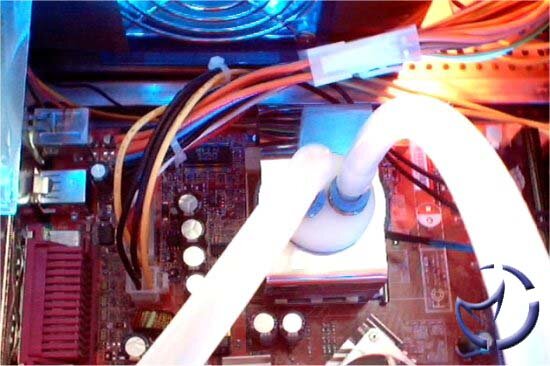
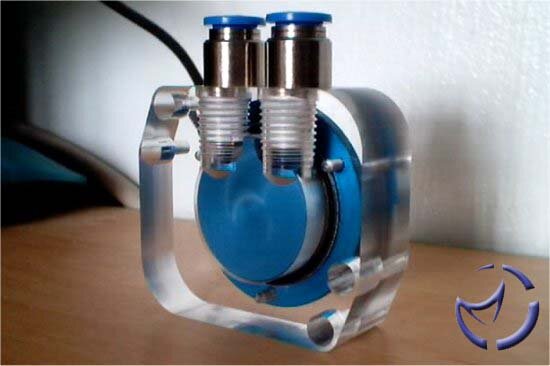
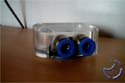
The GPU Cooler

The GPU cooler is new to the W&CC line-up since the last kit we reviewed, and follows in the footsteps of its big brother the CPU cooler. A clear acrylic surround with an internal anodized aluminium block of the same design as the CPU cooler makes for a beautifully crafted cooler; it almost seems a shame to hide it underneath a graphics card!
Once again we find the easy to use push fit connectors, and W&CC have done their best to insure this block can be used on the majority of Radeon's and GeForce cards out there that have the standard mounting holes around the GPU. Now I had a little trouble mounting this on my GeForce 4 Ti4600, as the holes surrounding my GPU were smaller in diameter than the supplied nylon bolts would allow.
However I was lucky in that their was room around the holes to widen them without destroying any of the traces. This is something that I have mentioned to W&CC, as have others, to which W&CC are going to start supplying a secondary set of bolts to use in this contingency. Fitting the block to my Radeon 9700 Pro AiW went without issue despite ATI's use of a shim around the GPU socket.
The block itself has 4 holes but only uses 2 holes for mounting, with the secondary set for different spaced mounting holes in differing graphics cards. Mounting this way (with nylon bolts going through the block) makes for a clean looking installation with no clamping mechanism to be seen. Installation obviously requires you to remove the standard aircooled sink on your graphics cards and for the majority of users this will simply be a couple of push pins, but for those of you with a cooler that also encompass the RAM then I'm afraid you will either have to go buy extra Ramsinks or do without the block.
Also, having the water inlet and outlet horizontally with the core does offer another advantage of it being difficult to trap air in the block as well as reducing the overall height used by the cooler; you will only lose the one PCI slot.