Installation

Click to Enlarge
Although I won't go too deeply into the installation process (it's all in the instructions found ), I will point out things you'd better remember to do while setting this up. I made a few gaffs due to my negligence, so hopefully you'll learn from my mistakes. The first thing to do is get out all the required tools. Assuming you're going to setup the relay switch to be a permanent addition to the case, this is probably the first thing you should do.


Click to Enlarge
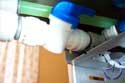
You need to find a spot for the A/C outlet. Be aware that you need to leave some clearance for the cover plate. Now, because I am a massive tool, when working with power tools, make sure you use items such as wood, vice grips, and lots of masking tape... all of which I did not do. The wood and vice grips will keep the case or motherboard tray secure while ripping into it. Extra masking tape will protect the metal from scratches and debris. Thankfully in the end, the A/C outlet looked pretty sharp on my Cooler Master ATC-201A, on the outside, but as you can see in the last picture (to the right) above, I did a real job at scratching up the interior.


Click to Enlarge
The A/C outlet installation is really the only mod you'll have to do. If you're wary about cutting into your case, just route the relay switch though an empty PCI back panel. You'll have to install the radiator next, followed by the pump and fill and bleed kit. It's up to you if you want to attach the tubes before or after setting the hardware up, but I suggest installing everything, then install the tubes in a mock installation just to verify the correct length of tubing. You next steps are to tape the waterblocks, install tube inserts, etc... I'm skipping all the details, since it's in the instructions (which you should read a few times before starting). After you're done setting everything up, you can go ahead and mix the coolant into a 1 litre bottle of distilled water and begin the fill and bleed process.
I chose to set things up without my hardware installed, which you can do as well, or set things up with it installed. If you choose to fill and bleed with the hardware pre-installed, and water does leak, it's not that big a deal (within reason... if you dump a litre of water in there, you might have a small problem :P). Simply dry off your equipment, but remember not to power anything up if it's wet.


Click to Enlarge
Once the system is filled, you can start the pump by turning it on. Initially, when wiring the relay switch, you'll set up the pump to turn on when it's plugged in. Later on, you can set it to switch on when you turn the PC power on. Assuming you've done the tube routing correctly, you'll get a nice flow of water going through the system. You should let this run for a few minutes (I waited five minutes) to get the air out of the system. If you notice air bubbles on the inner tubing, just tap it a few times to loosen it. You'll have to tilt your PC to the side, and let it run like that for another minute or so. Position the PC in an upright position again, and you're almost done.

Click to Enlarge
Before you stop the fill process, there will always be a fair amount of air trapped in the Fill and Bleed T, so you'll need to open the main valve, then close it a few times to flush all the air out. Be aware that if the water stops flowing into the bottle during this time, chances are, you're a Canadian that got an European pump (which is what happened to me, but this issue has be addressed by Swiftech). Once all the air is out, close the inlet valve, followed by the outlet valve, followed by the main valve. Empty the water out from the tubes leading to the valves from the water, and you're set to go. It is recommended that you let the system run over night to make sure there are no leaks.
Given that this is a closed loop setup, you'll probably not need to worry about water loss (provided you've installed the tubing correctly). I'd still give it a look once a month to make sure water levels are alright.
Test Setup


Click to Enlarge
Abit NF7-M nForce 2: Athlon XP 2400+ provided by (15x133: 2.0GHz, 12.5x189: 2.363GHz, 15x165: 2.487GHz), 2 x 256MB Corsair TWINX PC3200 Ram, Asus Ti4400, 120GB Western Digital SE 8MB Cache, Windows XP SP1, nForce 2 Unified Driver Package 2.1, Detonator 43.45.
The Cooler Master ATC201A will be the case used for all our tests. Given the physical space requirements of the liquid cooling tubing, we have removed the air guide and taped off the hole. Tests will be done with both the case fans on, as well as the case fans off. Most of our temperatures will be presented in Celsius, but you can grab a Celsius to Fahrenheit converter .
Overclocking
In terms of overclocking, I attempted to get by a couple of hurdles we've had with air cooling. One overclock that has always eluded us was the 15x166 OC. The other OC that has failed with air cooling was 12.5x199. We did have a bit more success, as both overclocks previously would never get past the POST (they just POSTed at those speeds, then rebooted). Now, we managed to get as far as Windows, and although I tried to get a screen shot, none of my imaging apps (or any apps for that matter) would open. In fact, a few mouse movements was enough to lock up the system. Unfortunently, we conclude that we are still unable to successfully reach our goals of stable OCs at those FSB speeds stated earlier.
For the GeForce 4, our luck was a little better as the core was able to reach 319MHz, whereas with the Thermaltake GF4 Copper Cooler only let us go up to 317MHz. Nothing could be done about overclocking the ram though, since the MCW50 doesn't make any contact with it.
NEXT