CPU-300-H06 CPU and GPU-180-L06 Blocks
There are no water blocks included with the Koolance Exos-Al, but we received the CPU-300-H06 and GPU-180-L06 water blocks with our package.
The blocks we received are designed to be used specifically with the Koolance Exos, although any system that uses 1/4" ID hoses will be able to use these blocks. One of the big changes from the previous Koolance blocks is crimps are no longer used to secure the hoses. This will make installation much easier, and through testing, we found their new connections to be quite secure.
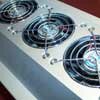
There are a number of "maze pins" inside the water blocks. These pins will create turbulance which will improve performance of the water blocks.
We were quite impressed with the quality of the base, as it is visibly flat and polished to a mirror shine. Of course, no two blocks are alike, and it is always a good idea to verify with a mock install with thermal paste.

The CPU-300-H06 includes a number of accessories to install the water block to your setup. We'll outline the parts more closely during the installation portion of the review, but the block is universal, and both AMD's XP and 64, as well as Intel's Socket-478 are covered.

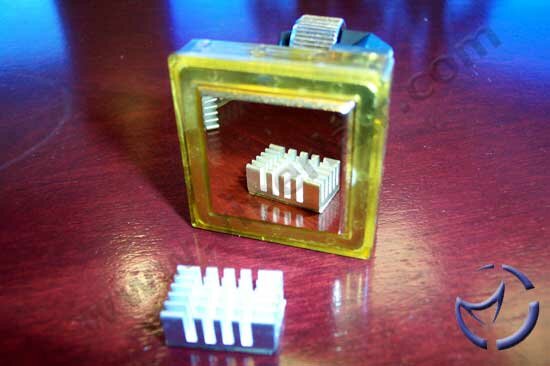
The GPU-180-L06 water block is much like the CPU block, except smaller. It shares the same hose attachment mechanism, and is compatible with most chipsets and GPUs.
Like the CPU block, great care was taken with the base, and it is also polished to a mirror shine.
There are plenty of accessories included, as well as ram sinks for your video card. There isn't any thermal epoxy included, but some thermal tape is preinstalled on the heat sink to facilitate installation.
Installation
The Koolance Exos-Al is easily the easiest water cooling setup we've had the opportunity to work with. Initial setup time was about 45 minutes, which is actually quite quick, but subsequent setups went much quicker, taking about 15-20 minutes. The following instructions are based on an Athlon XP setup without the GPU/Chipset block, but the rules apply for any CPU.
The first thing you will need to do is remove the protective sticker from the base of the CPU-300-H06 block. Taking the temperature probe, you need to place it into one of the recessed areas on either side of the base. Use a piece of metal tape (a small piece is included), and secure the probe.
On top of the CPU block, there is a metal bar with three indents. These indents are for the retention screw for the block, and depending on the CPU, you'll need to align the appropriate screw with the indents. Pentium 4 owners would use the center one, whereas Athlon users will use either of the other two.
The next step is to install the PCI circuit board to the back of your PC. Everything is pre-setup, so all you have to do is find a free area on the back of your case and screw it in. You will then attach the thermal probe's connection to the PCB, and if you want to hook up additional fans to be controlled by the Exos, you can attach up to two more. Since we'll want the Exos to turn on when the PC is powered on, you'll need to also connect the Exos' switch to the PSU which is no harder than plugging in a molex into the Exos' splitter, and connecting it to the PCB.
Next up are the hoses. The blue one is the external hose, and is used to connect the Exos to the first water block you'll be using. The clear one is the internal hose, and is used to connect the waterblocks to each other (in the case of two or more). From the last block, you'll need to use the blue one again (outlet) to exit the case to go back to the Exos.
Once you thread the hose though the PCI backpanel, slide on of the metal fasteners on to the hose. These fasteners can be found on each water block, and will need to be removed from them to continue this step. Once that is done, slide the hose onto the inlet (or outlet, depending which step you're at), and screw in the fastener to secure the hose.

The picture above illustrates what the finished attachment will look like. Continue this step for the remaining connections, and we're almost done.
Wrapping things up, after attaching the blue hose to the outlet of the last block, thread it back through the PCI panel. There are a couple of 90° clamps for the hoses to connect to the Exos. Installation to these are the same as the blocks. Once they are installed, snap them into the Exos, and lock them into place.
The next step is filling the Exos. It is important that the Koolance Exos-Al is the highest device in the liquid cooling chain. Koolance suggests not putting it on top of your PC chassis, which is a reasonable precaution since you wouldn't want to spill any water on to your computer.
We used the package Koolance sent over, which is pre-mixed, though you can use a litre of distilled water and a Koolance approved additive if you wish. You'll need to remove the cap from the top of the reservoir, and place a small funnel (included) into the hole. Slowly our the liquid until the reservoir is close to full (basically to the point where no more liquid goes in).

Seal the reservoir, and jump start the PSU. To do this, you'll need to jump the ATX power connections #4 and #6. This will start the pump in the Exos, and you'll see that the water should begin flowing through the hoses and into the blocks. I should mention that the diagram on page 17 of the manual does not match my Enermax PSU, but the colours for #4 and #6 are green and black (ground).
At this point, repeat the previous steps and pour some more liquid in, while the Exos is running. Once it tops off, seal it, and gently tilt the Exos back to front, left to right to make sure the system is properly fed. I usually go the extra step of doing this to my case to make sure water fills the blocks. Double check the water levels, and pour more in if necessary.
It is generally a good idea to let the system run for a few hours (overnight is better) to check for leaks. If all is well, turn off the PSU, remove the jumper cable, and connect the ATX connection to the mainboard. That's it.
NEXT