|
Written By: Matthew
Date Posted: May 6, 2002
3. Cut out shape (in masking tape)
Next print out your image, or draw it. After that, print out 2 more copies. With the cutting board, practice cutting your shape out 2 times or so with the exact-o knife. Trust me, its worth it to practice.
Once you've got your shape-cutting perfected, follow this process:
1) Clean your cutting board [I actually used plexi to cut on, it was clean]
2) Cut your image out as exactly as possible
3) Place pieces of masking tape on the board, making sure there are no air bubbles and ensuring that the pieces of tape overlap each other a reasonable amount (1/2 an inch?)
4) Place the cut out on the tape
5) Tape over the cut out image. This will keep the image in place.
6) Apply pressure over the image so you can see exactly where the cutout ends.
7) Finally, cut with the exact-o knife.
Now you have 2 objects. The original cutout with tape on top of it, and a tape cutout still on the cutting board.
8) Slowly and gently peel off the tape as to not rip it.
4. Spray paint
Okay, so now you're pretty proud of yourself& You've made the perfect bubble and you've got a really kickass pattern or image.
Please, test out how the paint you're going to use will react with your plexi with your test-strip of plexi. I used Rust-Oleum Professional High Performance Enamel (Flat Black.) The plexi will be shiny with something behind it so there's no reason to use a shiny color - it works kind of like a plastic varnish. If you want it to be kinda duller - almost like it's frosted greatly, then try taking some very fine sand paper [1500 -> 2000 grit] and lightly sand it (wet sand.)

Worked like a charm.
Place the masking tape on the inside of the bubble. Now, place masking tape on the outside of the bubble so it doesn't get sprayed accidentally and will prevent runoff. I've seen it happen... Lay down some newspaper or whatever and if you can, try to prop the bubble so that it's as even as possible. Please recognize that the paint towards the outside will drip towards the inside, so it is vital that you spray at least 2 or 3 times. Make sure you rotate the bubble while doing this also so that if the paint kind of solidifies towards 1 side, the other side will also have paint.
I messed up this way, I didn't rotate the bubble, I just put on 2 coats and peeled of the masking tape. The paint was there, but there was still light bleeding through - I had to take my sharpie and on the back of the bubble color it in so the light didn't bleed through.
Depending on your paint brand you will have to wait until the paint is dry to the touch. Then remove the masking tape.
Let the paint cure for some time [12 -> 24 hours or so].
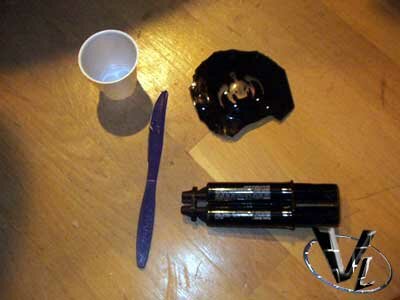
In this case, this was the outcome:
The paint will in fact stick to the plexi.
As you can see, the plexi itself does have a sort of reflective shine.
5. Secure bubble to bezel
Okay, since you did make this on your bezel it should conform to it pretty well. Just position it on the bezel and use Epoxy or hot glue. Make sure that you position it correctly, plan it out with tape - First I secured it with tape and applied epoxy.
6. Light it up
This really is dependant on what you want to do. I used an indiglo light to power the light source behind it, and I'm going to get a blue light filter also so it's not so green. A howto for rigging an indiglo light inside your case will be coming soon I believe, but so far unless I want to solder this onto my PSU, I'm going to have wires running out the back of my case.
Good luck making your bubbles - there are still many possible ventures which have not been explored yet - etching on the bubble, using it for a water supply, or even building in a hand-rest to your plexi lighted mouse pad. I will say though, that if you plan to etch, do it after you make your bubble because when the plastic melts it might screw up the etch. And don't forget to be safe - there's no point in making a case mod if you're going to burn off ½ the skin on your thumb.
Here are the final pictures:

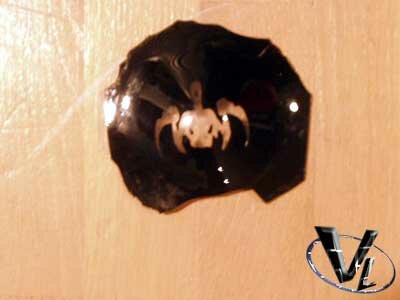
Without lighting
You can see the bubble quite clearly from this angle.
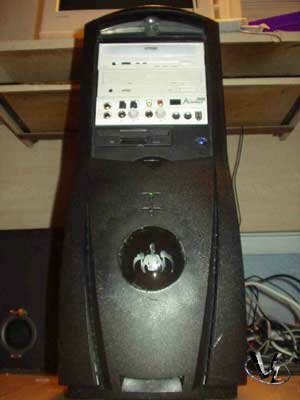
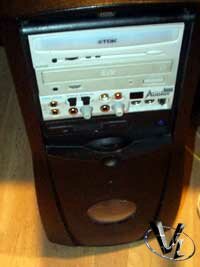
Whole front without lighting

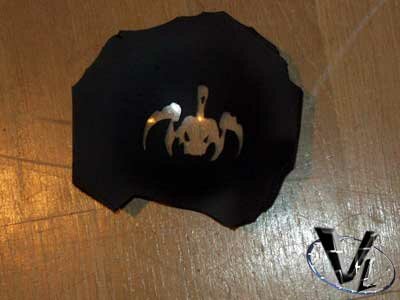
Lighted up
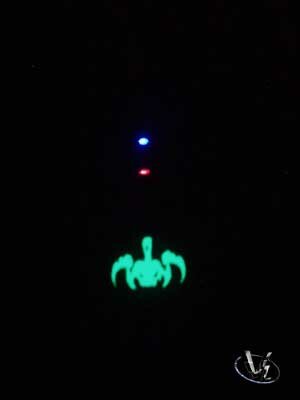
In the dark - almost looks intimidating.
That's all folks - Hope it helps you and thanks for reading this far.
Comments? Suggestions? Discuss it in our forums
Previous Page - Procedure
Home
|

