|
Introduction
No computer is complete without some form of storage, and the main choice of storage for the masses is a Hard Drive. I've had a couple of hard drives fail on me, and one failed due to heat. To be honest, I was surprised that it failed because of this, but since the drive was so hot I needed gloves to hold it, and I could bend it I think we can say without a doubt that the extreme temperatures killed it :)
have thought about this situation and provided end users with a product aimed to keep your drives cool, and add a bit of visual flair to your system at the same time. This is something that are no strangers to, since they already have there DCD-4002 Hard Drive cooler on the market. Let's take a look at today's review product, the . Thanks to for supplying the review product!

Specifications
Inner Fan: 40 x 40 x 20(mm)
Rated Voltage: 12 VDC
Rated Speed: 4500 RPM
Air Flow: 9.21 CFM
Noise Level: 29 dB(A)
Features
2 blue neon LED's at the front panel; best choice for show case.
Reduce hard drive surface temperature.
Suitable for any brand name hard drive.
Fits any 5 1/4 drive bay.
Supports both IDE & SCSI standard.
Reduce hard drive noise.
Removable front panel & filter for easy cleaning.
First Looks
  
The box that holds the unit inside is not much bigger than the unit itself, packing the Cooldrive3 into a tight white box inside. There's the usual pertinent information on the outside and a showy picture of the unit itself. Opening the white box you see the CoolDrive3 in a sealed bag, along with the instructions for installation and use, and a bag of screws.

The Cooldrive3 is light, being made of aluminium and the usual high quality manufacture. The idea of the unit is that, being made from aluminium, this will help to dissipate heat from the Hard Drive. Ok let's start at the top and move our way around.

On top of the Cooldrive3 is the Units logo. Having the logo on top like this is going to be irrelevant for the majority of end users, since unless you have a top window in your case, with the Cooldrive3 in the top 5 ¼ bay, you wont see it. Still it looks effective, but not in an overly "here I am" kind of way. You can see in the picture that the top is ridged, just like a Heatsink, which is of course the idea.

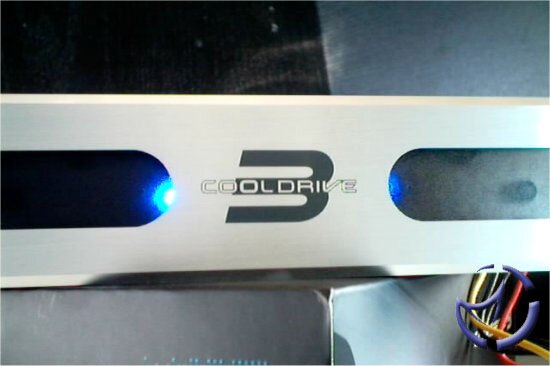
The sides are pretty much uneventful (just the screw holes naturally) but at the front we have a lot more action going on. As this is the part that end users will see once installed, have spent some time on the aesthetics and usability of the front panel. Dead centre we have another Cooldrive3 logo, again simple and not overly predominant. Too either side of this and extending to the outer edges are two strips of dark Perspex. The overall look of the front is quite tasteful with its aluminium appearance being supplemented by the darkness of the Perspex.
 
The front panel also contains a filter for the fan, which is directly behind the centre. To clean the filter you simply pull off the entire front panel, and this gives us a bit more of a view of the inner workings of the Cooldrive3. Dead centre we can see the 40mm Rifle Bearing fan. To either side of this are the two very bright blue LED's. On the front panel which has been removed, you can see a little tab to one side of the filter; lifting this allows us to remove the filter, clean it and replace it. To put the front panel back on you simply push it into place. It actually holds quite well despite the lack of any from of locking mechanism for the front panel. There are no worries of it falling off during transit or a heavy bump, the front panel requires a bit of effort to remove it.

Moving round to the rear it's pretty much nothing more than an empty hole, but there is one thing I would draw your attention to. As we look down the inside length of the unit, on the left hand side at the rear is a nice cable tidy, to keep the power lead out of your way. Simple and logical, it's nice a little touch.
 
Inside the unit we can see the nicely tidied cables as well as the 40mm fan. The fan on this unit is a rifle bearing fan pushing 9.21 CFM, which is quite a lot for such a small fan. Being rifle bearing should aid in the life of the fan, and if my experience with the neon fan is anything to go by, keep noise to a minimum too.
The bottom of the unit is where installation takes place, so let's move on and install a drive.
Installation
 
As I said before, the bottom of the unit is what you install a drive onto. The bottom attaches using 4 of the screws supplied to the unit, with you using the other 4 screws to attach the completed drive and tray assembly to the main unit. It's very simple and quick to install a drive, all you have to do is lay down your drive on the tray and screw it into place. I've used a 40gig IBM Deskstar (IDE) here, but you can use either IDE or SCSI drives. Once the drive and tray are attached to one another, flip the main unit over and put the tray, complete with drive into place. Screw the tray in and you're done. 3 minute job at most. Installing the unit into your tower is just as easy as any optical drive would be, just slide it in and screw it into place. Now supply screws for the tray, but none for the main unit itself, at least not in the sample I received. Not a problem for me since I have tons of screws lying around, but I'm not everyone. The length of the unit is about on par with your average optical drive so make sure you have room to install it. Another thing to think about is if your running 2 drives on one cable, make sure that your positioning of the Cooldrive3 is such that you can reach from one drive to the other with the cable. Installation went without any problems really, apart from having to find another 4 screws to attach the assembled drive bay to my tower. Ok, let's power it up and take a look at some installed pictures.
 
You can see here the bright blue LED's peeking out from the centre. I don't know if it's just me but I expected the entire front Perspex to glow, rather than having the two "cats eye" effect we see here. It's not just my pictures; that is exactly how it glows. That's a very personal statement but I would have to say I would have preferred the look if it had made the front glow all the way across. Another thing I'm not to keen on is how far it juts out from the bay. At the end of the day it's necessary to be able to get leverage to remove the front panel, but it does detract from the overall appearance in my opinion. I've put this unit into my old Juno Tower, as I was interested in how this would affect the door closing, but I'm pleased to say it wasn't a problem at all. The overall "overhang" is about 9mm, so this is another thing to keep in mind.

The fan noise produced is nothing to distracting but it is noticeable, mainly since it's in the front of your tower, and therefore close to you. I don't know if it's the Rifle bearing or simply some kind of muffling effect from the unit itself but the noise isn't the usual whine you would expect from a 40mm fan, sounding more like a 60mm fan.
Oh dear, from my personal point of view were not doing to well at the moment, but looks are not everything, lets see how the unit performs.
Testing
I've tested the Cooldrive3 in my Juno Full Tower (with all case fans removed and side left off) as if anything is going to heat up this Hard Drive, this poor excuse for a tower will : For idling, Windows XP was booted and left for at least 15 minutes. For load, an MPG was left encoding for 30 mins. Temperatures were averaged out over at least 3 reading in a 2 day period, and room temperature was maintained at 26C. A temperature probe stolen from a Lian Li front temperature panel was used to gauge the temperatures from 3 placements on the drive, the top, side and bottom, again with these temperatures averaged out between them.

There is a nice 3C drop in load temperatures compared to without the Cooldrive3. All those temperatures are within spec for the drive however, so I will leave it up to you to decide if the temperature difference is worth it to you. I was also curious as to which was providing the most cooling, the fan or the unit itself. So I disconnected the power from the Cooldrive3 (and therefore the 40mm cooling fan) and retested the temperatures.
It would seem that the fan provides about an extra 1C of cooling for your drive. All of this should hopefully extend the life of you drive. How this would have dealt with the boiling temperatures coming from the drive I mentioned in the introduction I don't know, but if you are at all worried about your Hard Drives temperatures, then perhaps you should invest in one of these. The cooling fan would probably provide more of a temperature drop if it was exposed more to the outside air, but since the front panel centre is closed of, the only air the fan can derive is from the sides of the front panel.
Final Words

Hard Drive coolers are not a new idea, and it is something that are no stranger to. They've gone back to the drawing board and designed a bay unit that provides ease of maintenance and good looks, as well as a useful ability to cool your hard drive. At least that's what it's supposed to do.
It is easy to use, and easy to install, the multilingual instructions provided might not be anything special but simple logic can tell you how to assemble this. The front panel and filter come off with a sharp tug, no clips or locking mechanisms to slow you down. The rest of the units functions require no user interaction at all, simply install and forget about it.
For the looks, it is mainly an aluminium unit, which gets points on its own. The logo's are not overly predominate and the dark Perspex adds a nice contrast. I was expecting (and perhaps therein lies the problem) the blue LED's to light up the entire front panel, but they didn't, more of a peek around the centre which gives you a two 'eyes' effect. The front panel juts out from the bay about 9mm, which gives you the leverage to be able to take off the front panel, but in my opinion it detracts from the design somewhat. It doesn't effect closing a door since it doesn't protrude far enough to cause problems.
Temperature wise it does reduce the heat by 3C under load, which should go some way to help prolong your drives life. All the temperatures are within specifications for the drive, regardless of the Cooldrive3 being used, so I will leave it up to you to decide if the extra 3C is worth buying this.
What I would have liked to have seen is the entire front panel glowing blue. I would have also liked to have seen a different method to remove the front panel, if only to be able to make the unit flush with the tower. Another feature that might have been a nice bonus would have been some form of temperature display, so at least you can instantly see the difference that the Cooldrive3 will make to your temperatures.
The Cooldrive3 is manufactured to Coolermaster's usual high quality standards, but unfortunately I can't recommend this product, since it doesn't do enough, either aesthetically or thermally to be of use. Thanks to for providing the Cooldrive3 for review.
Pros
2 Cool Blue LED's in the front Panel
Ease of use
Air filter for the 40mm fan is removable
Quick tug on the front panel for cleaning
Simple installation
Install and forget approach
3C drop in temperatures under load
High quality aluminium construction
Cons
Blue LED's don't light up the front panel much
Front panel protrudes by 9mm reducing overall look of the unit
Even without the unit, temperatures are within specs
Bottom Line
Only you can decide if this unit is worth buying. I personally wouldn't bother, but if the looks and temperature drop appeal to you, you can be assured of Coolermasters high quality.
Questions? Comments? Discuss it in our Forums
Home
|
 Cooler Master Cooldrive 3: Hard drives need cool love, and neglecting them could lead to corruption and drive failure. We checkout Cooler Master's latest drive cooler, and determine if it helps keep things cool.