A Brief History
Thermaltake has been an hsf manufacturer for years all the way back to Pentium II's and slot A Athlons using their Orb coolers. After a long period of time people figured out that the orb design was flawed and now have moved onto better cooling methods. Today we take a look at Thermaltake's Volcano 11+ Xaser edition.
Volcano 11+ vs. Volcano 11+ Xaser edition... differences?

First of all what makes the Xaser edition different from the regular Volcano 11? It's actually not much: both of them come, of course, with the heat sink, the smartfan, the thermal diode, and the mounting bracket with fan speed controller. The only difference is that the Xaser edition comes with a 5 1/4 inch drive bay fan speed controller as well. However because one can only use one of the three controllers at the same time (the temperature probe, the mounting bracket, or the 5 1/4 bay), I think that the inclusion of the 5 1/4 bay item is pretty useless.
Packaging and Box contents

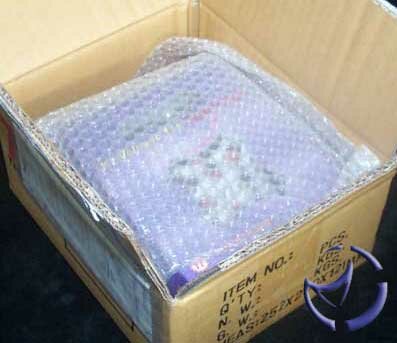
I received the package in the mail and it states "Sample Box" on the side making me wonder if the review sample packaging is not the same as the retail shipping packaging. Inside I found some bubble wrap on top of the retail box shown here:

Clearly visible is the Thermaltake fan grill on top of the smartfan, and the rear mounting bracket.

On one side you can see the 5 1/4 fan speed mounting bracket, and the other the different modes of the fan that one can use.
Finally, the back is the obligatory specs of the entire package.

Opening the box, all of the items were carefully packaged into a piece of cardboard that was well thought out. The heatsink and fan come completely assembled. This of course can be fixed with a screw driver.
Construction
Taking off the four small screws that attach the shroud and fan to the heatsink, we can now see the heatsink in all its glory. Notice the little webbing? Those are spacers chained together that help keep all the fins the same distance apart from one another. I actually found it to be a very nice feature, because the fins are delicate and when accidentally bending one, with the help of the chains the fin easily "pops" back into place.

The bottom of the heatsink I found to be quite raw, with very apparent grooves on the bottom of the heatsink. I found this in many ways to be expected though, because after all this is a budget heatsink.

Four screws attach the fan grill and the smart fan to the fan shroud.

I found the entire heatsink and fan construction to be very pleasing. I did however want the four small screws that attached the fan shroud to the base to be larger so that it could be taken off with a standard screw driver, but I don't think most people would have bothered with doing that anyway so it is not really a major issue. Seeing that the heatsink is quite small compared to other heatsinks and fans on the market, I wondered how well it would do.
NEXT


 Thermaltake Volcano 11+ Xaser Edition: Keeping in line with their Xaser theme, Thermaltake has released their Volcano 11, which other than a new look, it features a speed dial to control the fan speed.