BIOS
What does the BIOS look like, is it any different from most motherboard BIOS's? Lets look at a few of the screens that are specific to this motherboard, and there are quite a few that a specific to the motherboard.
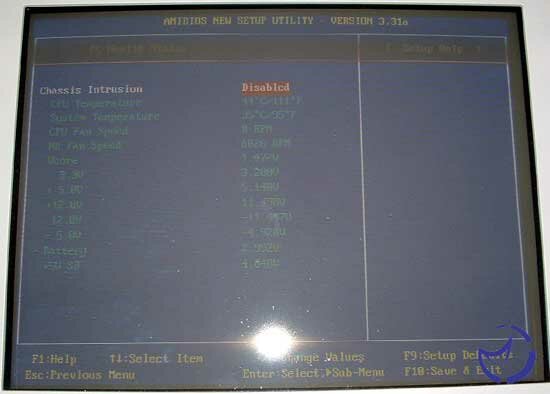
Lets look at two different sections, first the Standard CMOS settings as well as the temperature monitor menu. As we look at what should be a standard menu, we see something that is slightly different. Because this motherboard uses the ICH5R instead of the ICH5 we have four extra IDE spots, though we only have a total of two extra IDE ports, of the SATA variety. Apart from that the menu offers the standard features available to all motherboards. Next is the temperature monitoring menu, which offers the standard look at two temperatures, the standard voltages, and two fan speeds. Nothing extremely interesting, as there is no specific temperature that you can have set here for a warning.
Next lets look at the integrated peripherals section of the BIOS. Here you can choose to enable the USB controller, though why you wouldn't is beyond me. Also available is the option to enable the CSA Gigabit network card, which can be either auto or disabled. Then you have the choice for the Promise onboard IDE, which gives you the options seen in the left most screen, of SATA or RAID, which also works with SATA drives. Lastly is an option for enabling the onboard audio. There is an option of the onboard IDE configuration which takes you to the screen on the right. This allows many options in enabling the ICH5R's IDE drive configuration, what you see there is the configuration I used, with the last option being the only one that changed at any point.
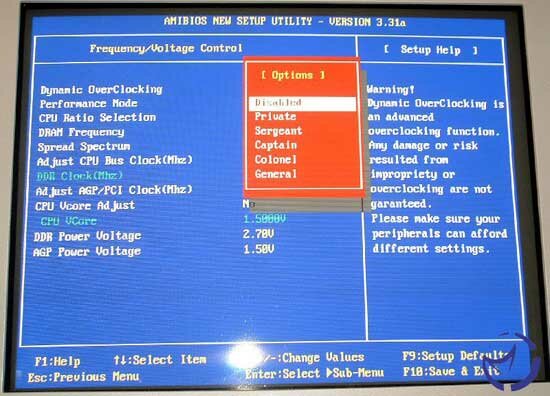
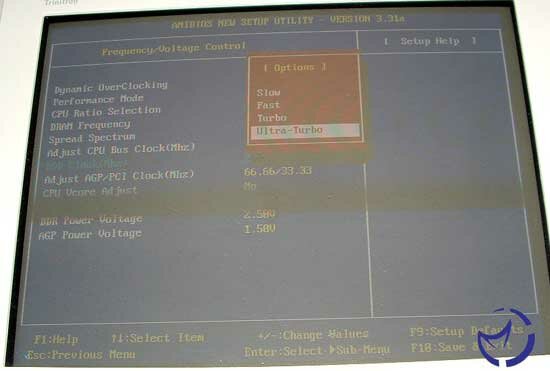
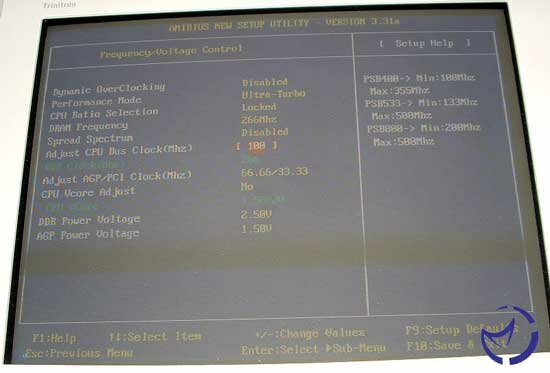
Now we will look at the spot where most of the tweaker/overclockers time will be spent, in the Frequency/Voltage control. With BIOS revisions after 1.2, you get the option for "Dynamic Overclocking" with some very interesting names for the varying levels, in a miltary theme from Private to General (just make sure that the General setting doesn't give you a protection fault). Next is the Performance mode, which basically controls the memory settings, though why the actual memory settings aren't here is odd, but apart from that it gives you some standard options: Slow, fast, turbo, and Ultra-turbo. The Ultra-Turbo option gives you the fastest settings that there are, of 2-2-2-5. Next is the FSB control, which allows you raise the FSB to either 355MHz or 500MHz, though how it is possible to reach these FSB speeds is frightening to me. However if you found a CPU that would do that, then this board has the options you are looking for.
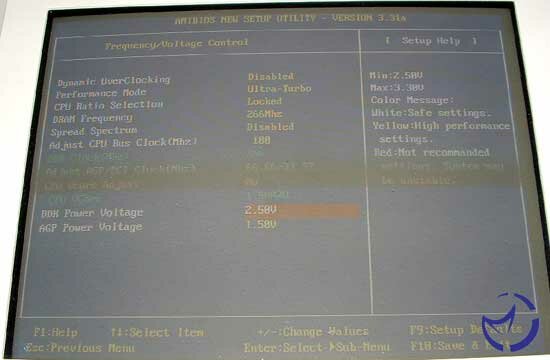
Lastly is the voltages, the CPU can go up to 2.3v which is scary for all but the most 'hardcore' overclockers. The DDR voltage can go up to 3.3v which is slightly higher than I've taken my RAM (3v) but gives that extra headroom if you need it. The AGP voltage goes up to 2.2v though there is an option to lock the AGP/PCI buses so that this isn't as necessarily needed as much, unless you want to overclock the AGP bus speed to get those extra few fps out of your card. A nice feature that MSI has included for the voltage settings is a color coded markers which tell you when you are reaching the danger zone for the piece that you are applying the voltage to. I must say that at least in theory MSI has provided some of the best overclocking options for a user to play with out of the motherboards I've tested so far.
RAID Setup and Overclocking
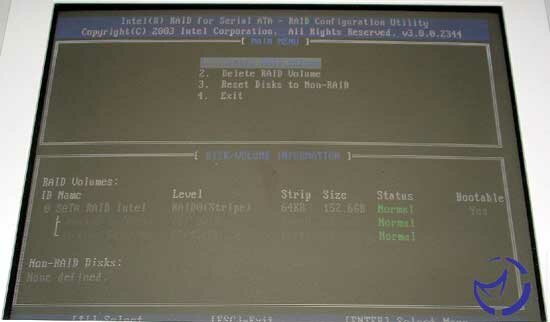
MSI has provided the ability to have up to three different RAID array's on this motherboard. The onboard ICH5R provides one SATA RAID 0 array, and the Promise controller offers one RAID 0 or 1 array for both the PATA drives and the SATA drives, thus allowing up to three arrays, assuming you have the drives needed. Lets look at both setup screens, first looking at the onboard Intel RAID controller.
The start up screen for the Intel RAID is fairly plain, telling you what arrays you have defined and what you haven't defined. It also shows that you need to press ctrl and I to enter the menu for the configuration of the array. A note is that this menu does move slightly quickly, so I would be ready to press the key's pretty quickly if you want to enter the menu. The configuration menu allows you to create, delete or reset the array, which is pretty standard for any RAID menu. You have the options for changing the strip size from 16KB to 256KB with 64KB being the default setting and the one I used for testing.
The Promise start screen shows less information than the Intel screen does, providing only the fact that there is a RAID array present and its size as well as how to enter the Fastbuild menu (ctrl and F). Once inside the menu you are greeted with the basic options of create, delete and resetting the array, however you also get the option to automatically setup the drives and view the drive assignments. The Intel program shows the information about the drives automatically so this is an extra step that Promise has you do, but it gives you the information about the drives and what array they are currently in. The RAID array gives you the same options for strip size as the Intel one has, and again we used 64KB for out testing. Overall the Intel program for its integrated RAID array is simpler and more informative up front, while the Promise program offers a couple more options to use.
All the settings are nice to play with but how does the system overclock with a PIV 2.4c processor? Can we reach the 'magical' 1GHz FSB? Let's see the results. Note that the highest overclock came with the Vantec AreoFlow PIV heatsink.

This was the highest overclock we were able to reach with the heatsink that we mentioned above. At this speed and voltage the CPU temperature was well in excess of 60ºC, with the case running at about 34ºC and the northbridge running at 60ºC. So it may have been that heat was an issue at this point. Overall a decent overclock, and pretty well in line with most motherboards. So how well does this board work performance wise? Lets look at the system we used.